Custom Tool Sets: OEM & Private Label Manufacturing Guide for Retailers and Brands

Key Takeaways
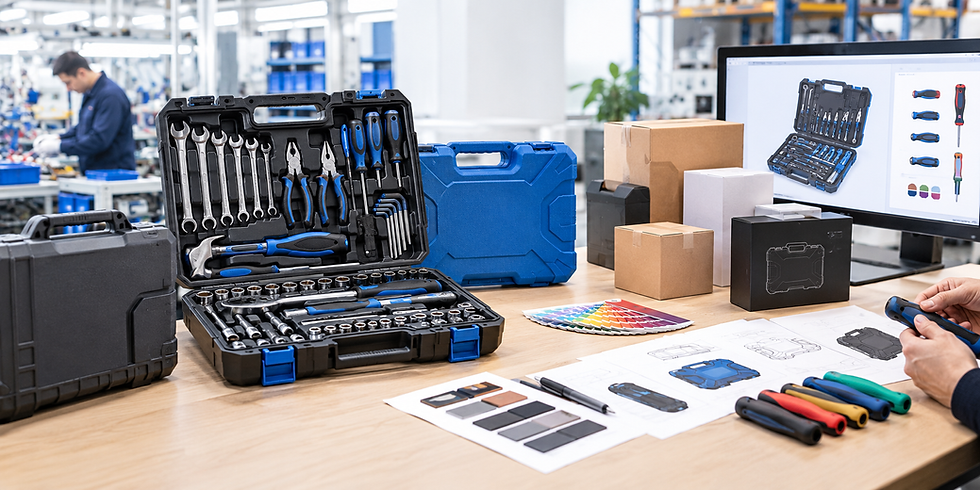
Custom tool sets give you more control over product fit, brand presentation, and supply planning than a generic assortment. The strongest programs connect market research with specifications, sampling, quality control, packaging, and replenishment.
Decide whether you need OEM development, private label customization, or a staged combination of both.
Define the customer, use case, assortment, specifications, storage format, and target price before requesting quotations.
Treat packaging, instructions, compliance, and visual identity as part of the product rather than last-minute additions.
Choose a manufacturing partner that can coordinate engineering, sourcing, assembly, QA, and delivery.
Build the business case around landed cost, order quantities, sell-through, returns, reviews, and repeat demand.
Understanding custom tool set manufacturing models
When you commission Custom Tool Sets, you are deciding more than which tools go inside a case. You are choosing how much of the product you control, how much development work you expect from the manufacturer, and how the finished range will support your retail or e-commerce strategy. A clear model at the start prevents mismatched quotations and avoidable revisions later.
The useful distinction is not simply whether a logo appears on a handle. It is whether you are selecting an existing product, modifying a proven platform, or developing a product and assortment around your own requirements. That choice affects tooling, minimum order quantities, lead times, testing, and ownership of the resulting assets.
OEM versus private label: What is the difference?
OEM usually describes a manufacturing relationship in which you specify, modify, or develop a product for your business while the manufacturer provides engineering and production capability. Private label generally means that an existing or selected product is sold under your brand, often with changes to color, logo, packaging, accessories, or assortment. The terms overlap in everyday purchasing conversations, so your written brief should define exactly what you expect.
A private-label program can be a practical route when speed and a controlled brand presentation matter more than a new mechanical design. An OEM program becomes more useful when your market needs a distinct configuration, custom tooling, a proprietary case, or a different combination of components. Private label tool set planning can help you map the process from manufacturer selection through packaging, testing, and distribution.
When to develop a proprietary tool set
A proprietary set makes sense when an existing assortment leaves a meaningful gap. You may be serving a specialist trade, building a retailer-exclusive range, or combining tools and accessories in a way that is not readily available from stock. The business case should be based on a clear customer problem, not novelty alone.
You should also consider the cost of tooling, sample development, testing, documentation, and future replacement components. A distinctive configuration may improve differentiation, but it can also make replenishment more dependent on your chosen supply chain. Before approving development, confirm that the expected volume and margin justify the additional engineering work.
How custom tool sets fit retail and brand strategies
A tool set can act as an opening price point, a premium flagship, a seasonal bundle, or a practical cross-sell beside larger equipment. Its role determines the assortment, packaging footprint, visual hierarchy, and amount of product education required. A professional buyer may value specification depth, while a general retailer may need a simple promise that can be understood quickly on a shelf or product page.
Your brand strategy should also determine how much of the customer experience sits in the tools themselves and how much sits in the case, insert, instructions, and after-sales information. Private-label tool kits can support a broader home improvement or workshop range when their finish, naming, and presentation are consistent with adjacent products.
Choosing between stock, modified, and fully custom products
Stock products are usually the fastest to source, but they give you the least control over assortment and differentiation. Modified products offer a middle path: you can adjust branding, packaging, colors, accessories, or selected specifications while using an established production platform. Fully custom products provide the greatest control, with higher development effort and more decisions to manage.
A staged approach is often sensible. You can test demand with a modified product, collect sales and review data, then invest in a proprietary configuration once the market signal is clear. Keep the transition in mind from the beginning so the first product does not create packaging, component, or tooling constraints for the next version.
Defining the right tool set for your target market
A strong set begins with the job your customer needs to complete, not with a predetermined piece count. You need to understand where the tools will be used, how often they will be carried, what level of performance buyers expect, and which omissions would lead to disappointment. Those answers shape the assortment more reliably than copying a competitor’s contents.
The specification stage is where commercial ambition becomes an engineering brief. It is also where you can prevent a common failure: adding inexpensive pieces to raise the count while weakening usability, case capacity, or perceived quality. Define the intended user and the acceptable compromises before a factory prices the set.
Identifying customer needs and use cases
Segment the audience by task rather than by a broad label such as “DIY.” A homeowner assembling furniture, a mobile technician, an automotive enthusiast, and a professional installer may all buy a tool set, but they will judge portability, durability, range, and organization differently. Interviews, service data, search behavior, retailer feedback, and product reviews can help reveal the tools customers actually miss.
Write several use cases in operational terms. For example, identify the work surface, environment, frequency of use, expected storage location, and likely skill level. This gives your product team a basis for deciding whether the set should prioritize compactness, reach, torque, corrosion resistance, quick identification, or broad coverage.
Selecting tools, sizes, materials, and specifications
Your bill of materials should state each tool, size, interface, material, finish, tolerance, and any performance requirement that can be measured. Where a tool interacts with another component, specify the fit rather than relying on a general description. Handle geometry, grip material, drive compatibility, case retention, and labeling deserve the same attention as the headline tools.
Ask for samples that let you compare the proposed material and finish with the intended price position. If you are developing a cordless assortment, document the battery platform, charger requirements, protection features, accessories, and regional electrical considerations separately. A detailed brief gives the manufacturer fewer opportunities to make assumptions that later become change orders.
Balancing professional performance with consumer usability
Professional performance does not always mean adding more pieces or selecting the heaviest construction. A consumer may value clear identification, intuitive storage, manageable weight, and instructions that explain the basic purpose of each item. A trade user may accept a denser layout if the set survives frequent transport and makes tool control faster.
The right balance comes from the use case and channel. Test whether a user can remove and replace each tool without disturbing the rest, understand the size markings, and close the case without pressure on the contents. Usability is a quality requirement, not merely a packaging preference, because frustration can appear in returns and reviews even when the tools technically function.
Matching the set to your price point and sales channel
A set designed for a marketplace listing has different constraints from one sold through a trade distributor. Online, your imagery and product page must explain the contents without physical handling, while wholesale buyers may focus on carton dimensions, pallet efficiency, replenishment, and margin structure. Retail shelf space adds another constraint: the case must communicate value quickly without becoming unnecessarily large.
Use a target cost range before the assortment is finalized, but do not reduce the discussion to unit price. Review the complete offer, including packaging, inserts, testing, tooling amortization, freight, duties, and inspection. The private-label e-commerce approach is useful as a reminder that differentiation and quality control need to work alongside overhead and margin planning.
Designing the product, packaging, and brand experience
The product experience begins when a buyer sees the case and continues until the tools are used, stored, and reordered. A well-designed set makes the contents legible, protects them in transit, and gives your brand a consistent physical presence. Packaging should support the sales channel while remaining honest about what the set includes.
A coordinated design process also reduces rework. Tool layout, case geometry, labels, inserts, photography, and carton specifications affect one another, so approving them in isolation can create fit problems or conflicting information. Bring the product and packaging teams into the same review cycle.
Creating a functional tool arrangement and storage case
Start with the retrieval sequence rather than the empty case. Place frequently used tools where they can be identified and removed quickly, keep related items together, and leave enough visual separation for missing pieces to be noticed. The case should protect the tools without forcing the user to fight clips, elastic loops, foam, or molded cavities.
Consider hinge strength, handle comfort, closure security, stacking, internal movement, and the conditions of transport. If the case is intended for a vehicle or mobile service environment, vibration and repeated opening may matter more than a polished showroom appearance. A layout review with physical tools is more reliable than approving a drawing alone.
Applying brand identity to tools and accessories
Your brand identity can appear through logo placement, handle colors, finishes, case materials, molded details, and a consistent naming system. Apply it with restraint. A logo that interferes with size markings or a bright finish that hides wear can weaken the product experience rather than improve it.
Specify the logo method, position, dimensions, color references, and durability expectation. Laser marking, printing, molding, labels, and badges each create different visual and production results. If the set includes accessories from multiple component suppliers, establish a shared color and finish standard so the assortment looks intentional.
Developing packaging for shelves, e-commerce, and wholesale
Packaging has to survive the route to the customer and communicate the offer in the place where it will be sold. Retail packaging may need front-panel clarity and shelf efficiency; e-commerce packaging may need stronger protection and images that explain the contents; wholesale cartons need handling information, dimensions, quantities, and reliable identification.
Prepare a packaging specification that covers the inner case, retail carton, master carton, pallet pattern, protective materials, and barcode placement. Include product photography and dimensional checks before final approval. A packaging concept that looks attractive in a mock-up can still fail if it increases dimensional weight or leaves the case vulnerable to impact.
Planning instructions, labels, certifications, and inserts
Instructions should cover assembly, safe use, charging where relevant, storage, cleaning, and limitations without promising performance that has not been tested. Labels need to match the actual product configuration, language requirements, warnings, country-of-origin rules, and traceability information for the target market.
Create a controlled artwork process. Keep approved files, revision dates, translations, regulatory statements, and component references together, then verify the physical sample against the final artwork. This is also the right stage to plan QR codes, warranty information, replacement-part guidance, and a concise contents diagram.
Selecting an OEM manufacturing partner
Your partner selection should assess coordination ability as well as machine capacity. Tool sets combine multiple components, finishes, packaging operations, and inspection points, so the supplier that quotes the lowest individual unit price may not provide the lowest total project risk. You need visibility from product brief through assembly, shipment, and replenishment.
Ask how the prospective partner handles engineering changes, component substitutions, sample approvals, nonconforming goods, and production updates. A concept-to-container partner should be able to explain who owns each handoff and how information moves between design, sourcing, factories, QA, packaging, and logistics.
Evaluating factory capabilities and production experience
Review whether the partner has experience with the categories, materials, finishes, case formats, and sales channels relevant to your range. Ask to see a capability map rather than accepting a general statement that “everything is possible.” You should understand which operations are performed directly, which are coordinated through audited manufacturing partners, and where final assembly and kitting occur.
Diversitech Global positions its work around OEM and private-label tool set manufacturing, including product concept, sampling, engineering, sourcing, assembly, quality coordination, packaging, and launch-ready materials. That broad coordination model can be useful when your program contains several tool families and you do not want to manage every supplier handoff separately.
Reviewing quality systems, audits, and compliance support
Request evidence of the quality process at each stage: incoming components, in-process production, assembly, packaging, and final inspection. Clarify inspection levels, sampling plans, defect classifications, corrective-action procedures, and escalation contacts. Audits should be relevant to the facilities and production lines that will actually handle your order.
Compliance support should be matched to the market and product. Ask who identifies applicable requirements, who arranges testing, how reports are stored, and what happens if a component or specification changes. You remain responsible for your market obligations, but a capable partner should make the evidence and decision trail easier to manage.
Comparing minimum order quantities and production capacity
Minimum order quantity should be evaluated alongside demand, component availability, packaging commitments, and reorder flexibility. A low quoted MOQ may not apply equally to custom handles, cases, colors, cartons, or battery-related components. Ask for a component-level view so you can see which items create the real volume threshold.
Capacity discussions should cover normal monthly output, peak-season allocation, labor and equipment constraints, and the effect of your requested assortment. Confirm whether multiple product variants can run in parallel and how replenishment orders are prioritized. The goal is not simply a large factory; it is dependable capacity for your specific program.
Protecting designs, tooling, and intellectual property
Document ownership before development begins. Your agreement should address drawings, CAD files, molds, dies, artwork, test reports, packaging files, product photographs, and any custom component. It should also define confidentiality, permitted use, approval rights, and what happens to tooling if production moves or the program ends.
Control access to the latest files and maintain an approval register. Mark proprietary elements clearly, but do not assume a logo alone protects the underlying design. For complex or high-value programs, obtain appropriate legal advice in the relevant jurisdictions and make production release conditional on the agreed documentation.
Managing customization, prototypes, and product development
Customization works best as a sequence of controlled decisions. Start with a commercial brief, translate it into technical requirements, review physical samples, and release production only after the agreed specifications are frozen. Each step should leave an auditable record that a buyer, engineer, and quality manager can understand.
This process is where an experienced partner can reduce friction between what the market wants and what production can repeat. You should still own the commercial decisions, but you should not have to translate every engineering, packaging, and sourcing issue without support.
Turning product requirements into technical specifications
Convert customer language such as “premium,” “compact,” or “professional” into measurable requirements. Define dimensions, tolerances, materials, hardness where relevant, surface treatment, logo application, tool count, case fit, packaging, test methods, and acceptance criteria. Give every component an identifier so the bill of materials, drawings, samples, and inspection records stay aligned.
Separate mandatory requirements from preferences. This helps the manufacturer price the project accurately and gives you a rational basis for handling trade-offs. It also makes a later revision easier: you can see whether a change affects fit, tooling, compliance, cost, lead time, or only appearance.
Reviewing samples and testing tool performance
A sample review should cover function, finish, dimensions, ergonomics, contents, layout, labels, and packaging rather than focusing only on whether the logo looks correct. Use the tools in representative tasks and, where possible, ask several intended users to assess them. Record observations with photographs, measurements, and a numbered action list.
Do not treat one approved sample as proof of production consistency. Confirm what was sampled, which materials were used, and whether the production process can repeat the result. If the case, insert, or accessory changes after tool approval, review the complete assembled set again because small fit changes can affect the customer experience.
Approving materials, finishes, logos, and packaging
Use physical standards for colors, textures, coatings, printing, and packaging whenever appearance matters. Digital artwork is useful, but it cannot fully predict molded color, gloss, surface texture, or the interaction between a finish and a tool’s working environment. Keep the approved standard with the production documentation.
Diversitech Global’s documented coordination model includes customization, packaging, sampling, and quality support, which can reduce the number of disconnected approvals in a multi-component program. You should still issue a formal approval covering the complete set, including the tool assortment, case, inserts, outer carton, and required markings.
Handling revisions, tooling costs, and change orders
Revisions are normal, but uncontrolled revisions are expensive. Establish a change-order process that states the reason for the change, affected files, tooling impact, sample requirement, cost, schedule effect, and approval authority. Avoid approving a visual change by email if it alters a dimension, material, interface, or compliance status.
Separate one-time development costs from recurring unit costs. Tooling may be amortized across an order, paid separately, or retained as an asset, depending on your agreement. Before changing a design late in development, compare the cost of the change with the likely commercial benefit and the risk of delaying launch.
Controlling quality, compliance, and supply chain risk
Quality is easier to manage when it is defined before production rather than judged informally at the end. Your control plan should connect specifications to inspection methods, sampling levels, responsible parties, and release decisions. It should also recognize that a tool set can fail as a system even when each item looks acceptable.
Supply chain risk deserves the same discipline. Multiple components, factories, finishes, and packaging suppliers create more opportunities for delay or variation. A clear bill of materials, approved alternatives, realistic lead times, and a replenishment plan give you more options when conditions change.
Setting measurable quality standards and inspection criteria
Create an inspection checklist that covers appearance, dimensions, function, tool count, markings, case fit, packaging, and carton condition. Define critical, major, and minor defects in terms your inspection team can apply consistently. Include photographs or physical standards for subjective attributes such as color, scratches, flash, coating, and print quality.
Use a pre-production approval, first-article review, in-process check, and final inspection where the program warrants it. Quality records should identify the order, production date, materials, sample size, findings, corrective actions, and release status. This turns a general promise of quality into a repeatable control process.
Testing durability, safety, corrosion resistance, and fit
Testing should reflect how the set will be stored, transported, and used. Depending on the product, that can include torque or load tests, repeated operation, drop and vibration exposure, corrosion evaluation, coating adhesion, battery and charger checks, case closure cycles, and fit verification. Define the test method and pass condition before results are available.
Pay attention to interfaces: a socket must fit its drive, an insert must retain its tool, a case must close without damaging contents, and a charger must match the intended battery system. The test record should identify the exact sample and configuration, because a result from one version may not apply after a material or supplier change.
Addressing international standards and market requirements
Market requirements vary by destination, product category, electrical system, labeling rules, language, packaging, and claims. Build a compliance matrix for each target market and identify which requirements apply to the complete set and which apply to individual components. Do not assume that a report for one model, factory, or region automatically covers a revised product.
Coordinate testing, declarations, labels, manuals, and technical files as one package. If you sell through multiple channels, check their documentation and packaging requirements separately. A product can pass a technical test and still be delayed or rejected because its markings, paperwork, carton data, or listing claims are incomplete.
Planning lead times, logistics, inventory, and reordering
Your launch schedule should include design, tooling, sampling, testing, artwork, component purchasing, production, inspection, freight, customs, receiving, and listing preparation. Add practical contingency rather than building a plan around the fastest possible handoff. Seasonal demand and factory shutdowns can make a nominal production lead time misleading.
Diversitech Global’s brand brief cites operational performance figures of 99% on-time delivery and a 0.6% defect rate. Treat such figures as stated business performance information, not as a substitute for order-specific service levels, inspection rights, or a written delivery plan. Your purchase agreement should still define dates, tolerances, remedies, and communication expectations.
Building the business case for custom tool sets
A custom set earns its place when the additional control creates commercial value. That value may come from a better assortment, stronger brand recognition, improved shelf or listing conversion, reduced packaging waste, more reliable replenishment, or a margin structure that a generic product cannot provide. You need to measure the full investment rather than comparing factory unit prices alone.
Build the model before you finalize the design. A change in case size can affect freight; a new handle can create tooling; a small accessory can alter the bill of materials and carton dimensions. Connecting these variables early helps you choose a product that is attractive to customers and workable for your operation.
Calculating development, tooling, unit, and landed costs
Separate one-time and recurring costs. One-time costs can include industrial design, engineering, prototypes, molds, dies, testing, artwork, photography, and initial setup. Recurring costs can include tools, components, assembly, kitting, packaging, inspection, freight, duties, insurance, warehousing, payment charges, and marketplace fees.
A simple landed-cost model should show each major assumption and allow you to test scenarios. Use realistic order quantities, currency rates, freight modes, defect allowances, and rework or replacement provisions. If a quotation bundles several services, request enough detail to understand what is included and what could become an extra charge.
Setting wholesale, retail, and marketplace pricing
Pricing should reflect the channel’s costs and the customer’s view of value. Wholesale buyers need room for their margin and operational expenses; direct retail pricing must absorb fulfillment, marketing, returns, and support; marketplaces may add referral, storage, advertising, and payment fees. The same set may require different pack sizes or service assumptions by channel.
Avoid using the piece count as your only value signal. Buyers may respond more strongly to a relevant assortment, better storage, clear specifications, dependable warranty handling, or a case that fits their workflow. Your product page and sales materials should connect those benefits to evidence rather than vague quality language.
Estimating order quantities, margins, and break-even points
Estimate demand in stages: initial launch inventory, expected monthly sales, seasonal peaks, reorder lead time, and safety stock. Then calculate contribution margin after variable channel and fulfillment costs. Break-even analysis should include the development and tooling investment, not just the margin on each shipped unit.
Run conservative, expected, and strong-demand scenarios. Check what happens if sales are slower, freight rises, a component must be replaced, or a reorder arrives late. This exercise can point you toward a smaller initial assortment, a modified platform, or a packaging change that reduces inventory exposure without weakening the offer.
Measuring sell-through, returns, reviews, and repeat demand
After launch, track more than revenue. Sell-through by channel, return reasons, defect claims, review themes, customer questions, replacement requests, reorder timing, and attachment sales will show whether the set is working as designed. Separate product problems from listing, packaging, fulfillment, or expectation problems so the corrective action is appropriate.
Use the findings to improve the next production run. If customers repeatedly praise organization but complain about one missing size, the solution may be an assortment revision rather than a full redesign. If returns cite damage in transit, investigate the packaging and logistics chain before changing the tool specification.
Frequently Asked Questions
What is the difference between OEM and private-label tool sets?
OEM usually involves developing or modifying a product to meet your requirements, while private label commonly places your brand on an existing or selected product with agreed changes to presentation, assortment, or specifications. The exact scope should be defined in the project brief and agreement.
How many tools should a custom tool set contain?
There is no universal ideal count. Choose tools and sizes according to the intended tasks, user skill level, case capacity, target price, and sales channel. A relevant assortment is generally more valuable than a larger count filled with rarely used pieces.
When is a fully custom tool set worthwhile?
It may be worthwhile when a clear customer or channel need cannot be met by stock or modified products, and when expected demand can support development and tooling costs. You should validate the opportunity before committing to a proprietary design.
What should be included in an OEM tool set specification?
Include the assortment, dimensions, materials, finishes, tolerances, performance requirements, logo application, case design, packaging, labels, testing, inspection criteria, and target markets. Identify mandatory requirements separately from preferences.
How can you control quality before mass production?
Approve drawings and materials, review physical samples, test representative use cases, define inspection criteria, and document the final approved configuration. A first-article or pre-production review can identify fit, finish, packaging, and labeling problems before the full run.
What costs should buyers include in the business case?
Include development, tooling, samples, testing, unit production, assembly, packaging, inspection, freight, duties, warehousing, channel fees, marketing, returns, and inventory carrying costs. Separate one-time investment from recurring landed cost so your margin calculation is realistic.
How long does custom tool set manufacturing take?
The timeline depends on whether you use stock, modified, or fully custom products, as well as tooling, testing, component availability, packaging, production capacity, and logistics. Build a schedule with approval gates and contingency instead of relying on a single factory lead-time estimate.
Conclusion
Custom tool sets are strongest when you treat them as coordinated products rather than collections of components. Diversitech Global has been engaged in the hardware tools industry for over 25 years. Our OEM/ODM team is highly experienced and can create the most market-competitive customized tool sets for you.


Comments